Using Microsoft Graph API inside Microsoft Flow in Office 365
Introduction
There are challenges I met in this simple task:
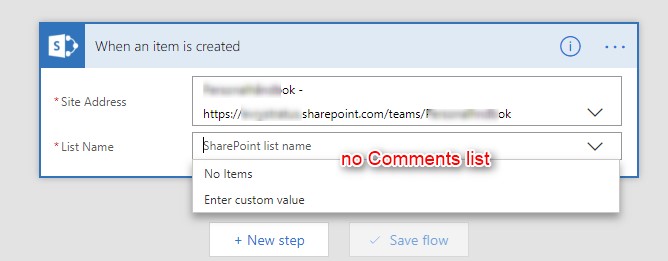
Comments list is hidden and you will not see it in MS Flow actions.
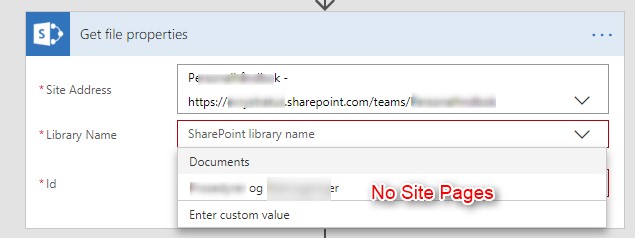
For notifying an author of the page, you need to receive a parent item. The standard “Site Pages” library is not presented in MS Flow actions.
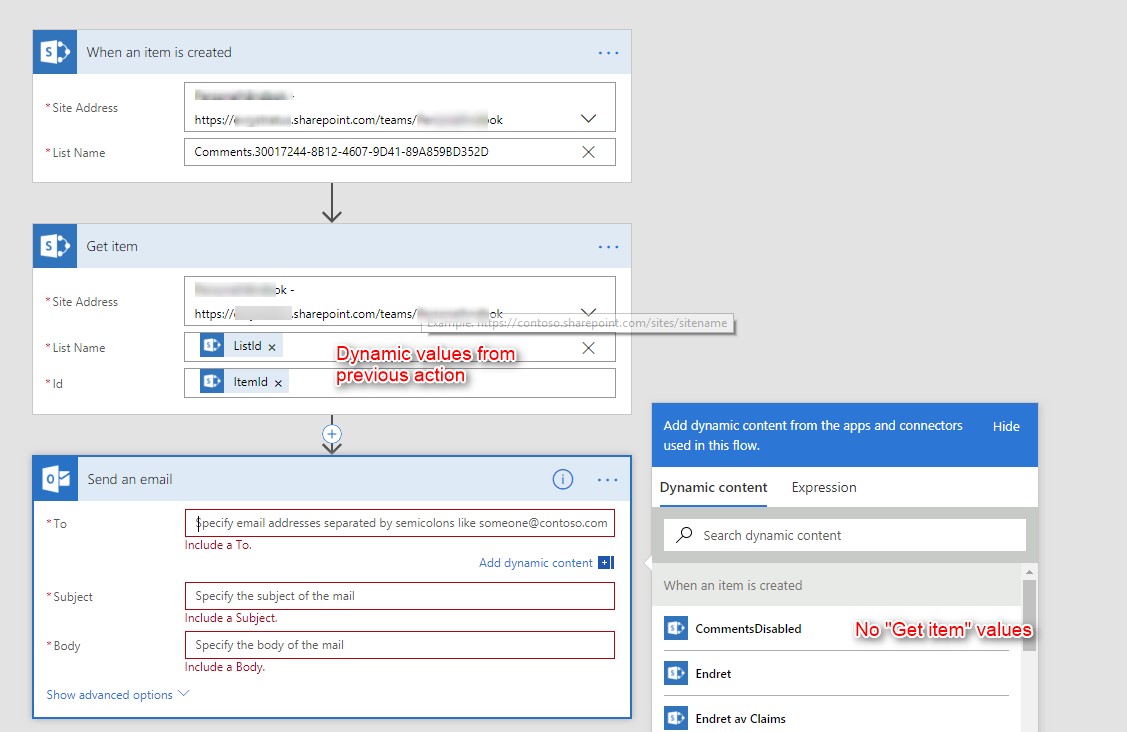
“Get item” action doesn’t work with dynamic values. You can pass ListId and ItemId parameters into this action, but there is no output you can use in next actions.
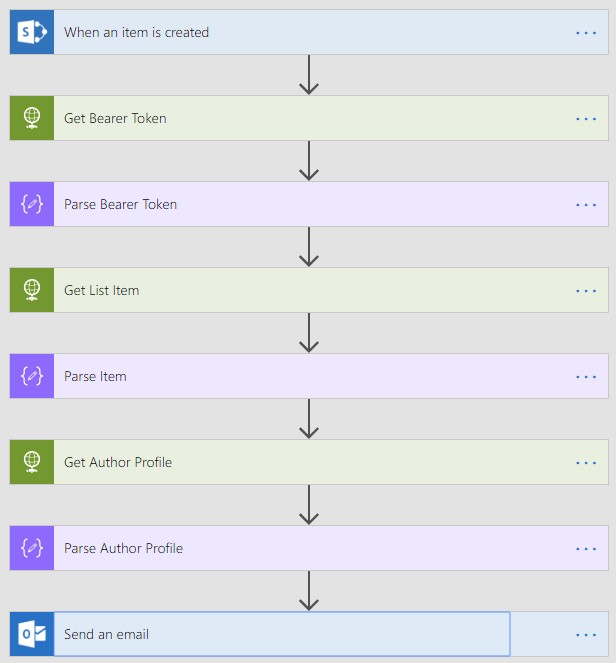
Finally, I found a solution how to use MS Graph API to complete this flow demonstrated below:
- Creating and registering an Office 365 app with access permissions to MS Graph API.
- Authentication/Authorization call from MS Flow using custom app credentials from p.1.
- Calling MS Graph API from MS Flow using token from p.2.
I have described the whole process in the following seven steps.
Step 1. Starting a flow
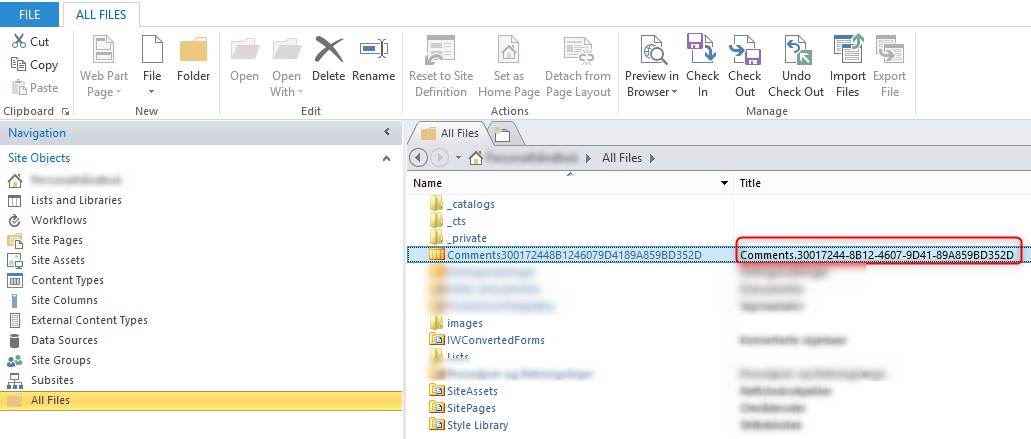
First, you need to find a name of the hidden comments list. Open SharePoint Designer and connect to your site using the owner’s credentials. You can find the list title as shown below:
Now, you can create the first step of your new MS flow:
Open MS Flow portal and log in to your account.Choose My Flows -> Create from a blank.

Choose a trigger “When item is created”

Specify the site URL and comments list title.

Step 2. Register Office 365 App with Graph API permissions
First, you need to understand what methods of Graph API you need. I use Graph API explorer to find necessary methods:
- Get an item in a list.
- Get a user (to find a user profile with email).
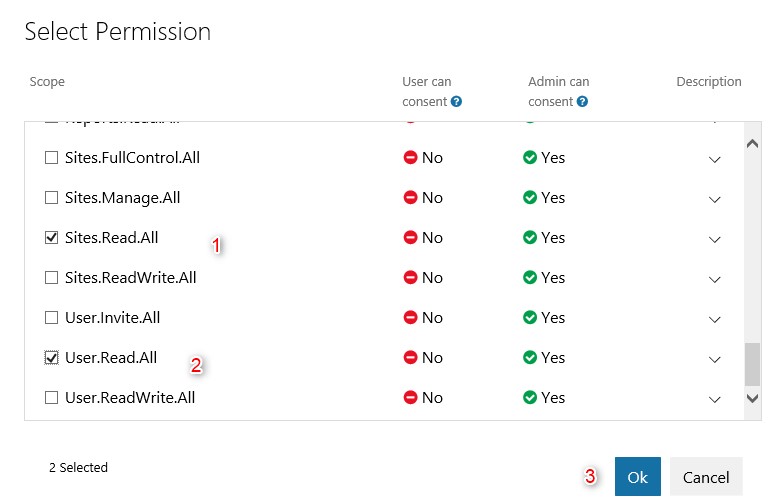
I need permissions Sites.Read.All and User.Read.All to call these Graph API methods.
An app registration process:
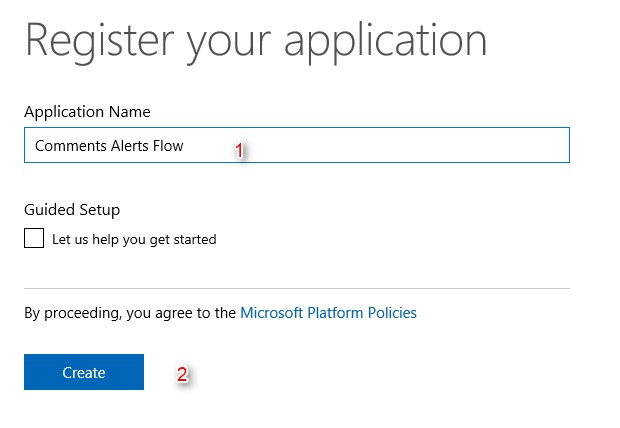
Go to App Registration portal and sign in with your Office 365 account.Press “Add an App” and type the name of your app. Push the Create

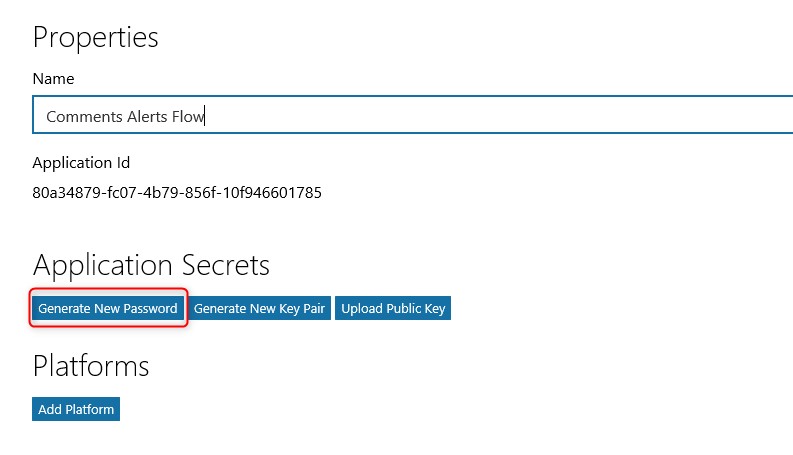
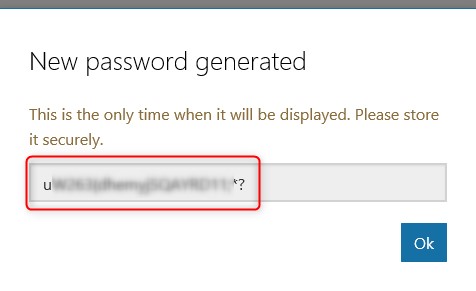
In properties page press “Generate new password” button. Copy-paste and save app secret for later usage.
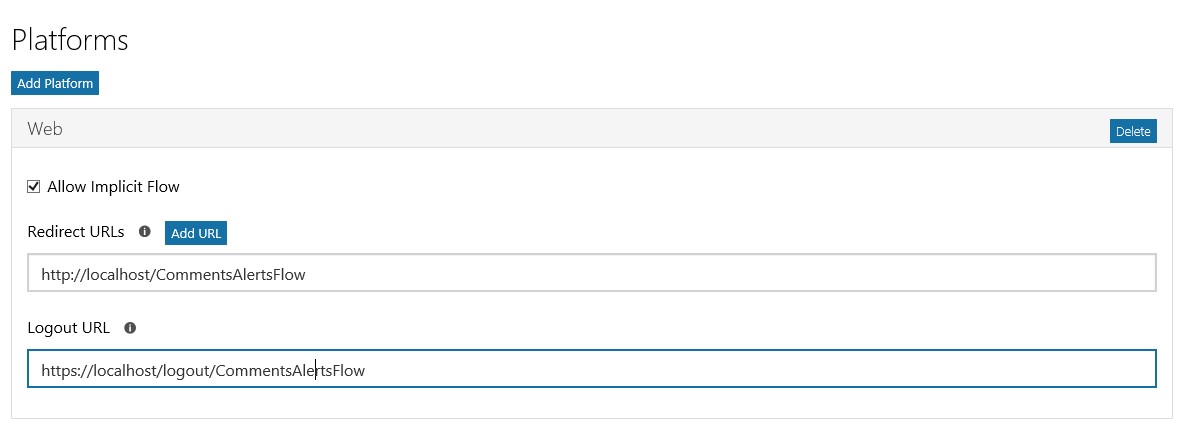
Add platform to the app:
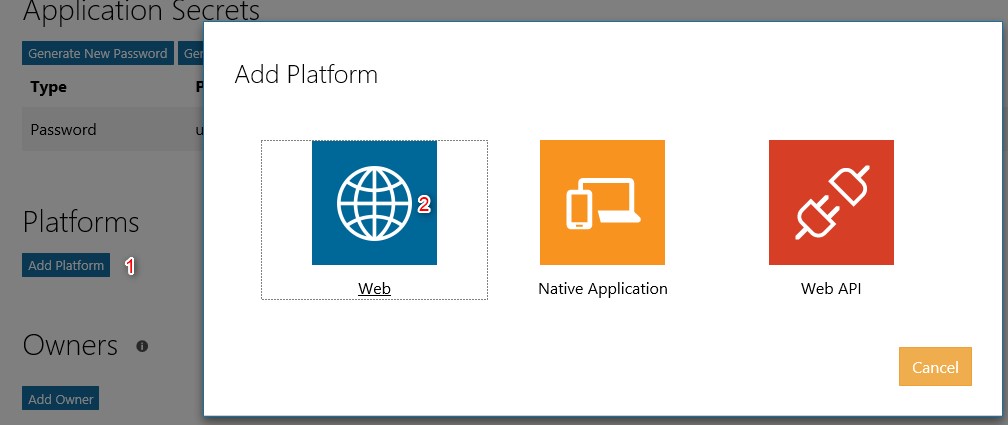
Specify URLs for the web platform. You can specify any URLs, because they are needed only for the first app authentication.
Add permissions Sites.Read.All and User.Read.All to your app and save changes.

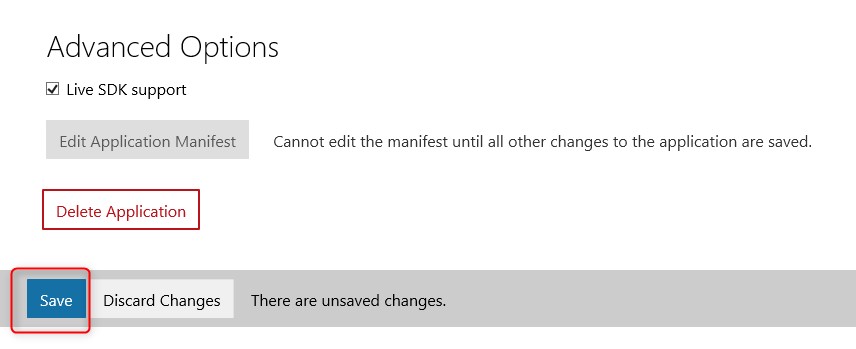
The app registration is completed!
Now, we need to authenticate an app and receive the administrator’s consent. Before making a call /adminconsent endpoint we need to know the tenant ID of your Office 365.
Step 3. Retrieving Office 365 tenant ID.
Go to the Admin Portal of Office 365 using admin credentials.Expand “Admin centers” and click on “Azure AD”.
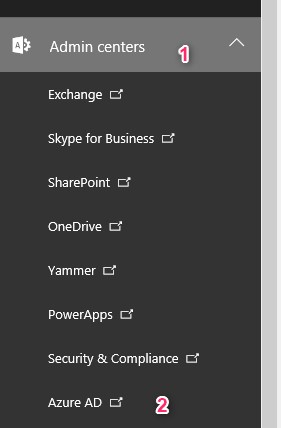
In Azure portal, choose “Azure Active Directory” -> Properties. A directory ID text field contains tenant ID. Copy it and save to use it later.
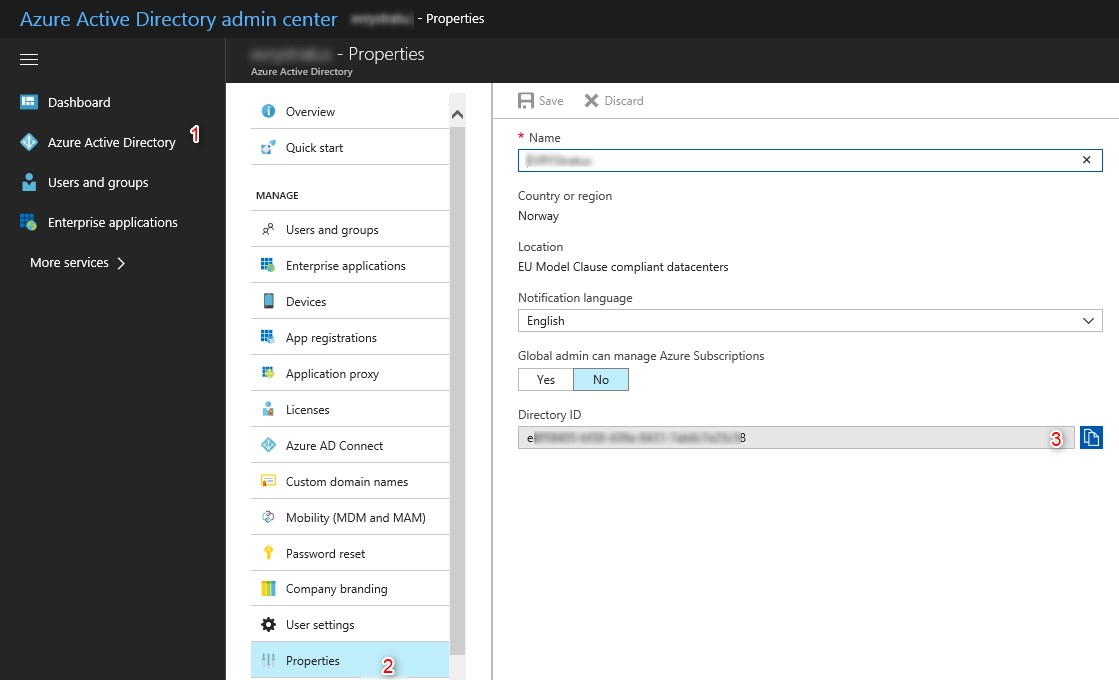
Step 4. Authentication app using admin consent.
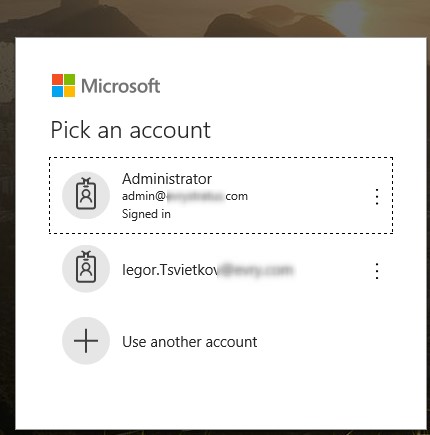
Open a browser and paste this URL. Replace {tenant} with tenant ID from step 3 and {appid} with app\client Id from step 2.Sign in as Office 365 administrator.
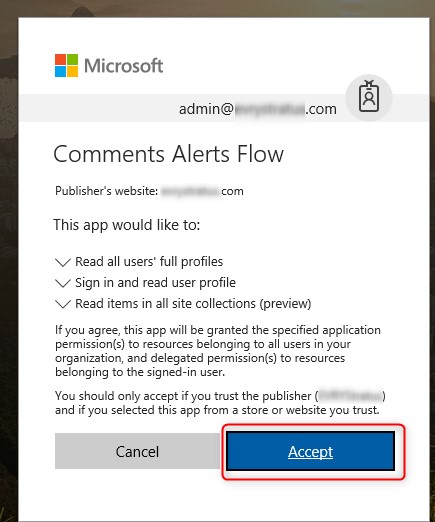
Review app permissions and press “Accept”:
You will see a “Bad request” window. It’s normal, because MS identity provider tries to send a response to redirect_uri=http://localhost/commentsalertsflow. Don’t worry – the app got the admin consent.

If you use a Fiddler or Browser dev tools, you able to see success response like:

Step 5. Get OAuth 2 access token inside MS Flow.
Before starting using Graph API we need to receive site id using Graph API method “Get a site resource”:
Open Graph API explorer and sign-in using your O365 account.Choose method “SharePoint site based on relative path of this site”:
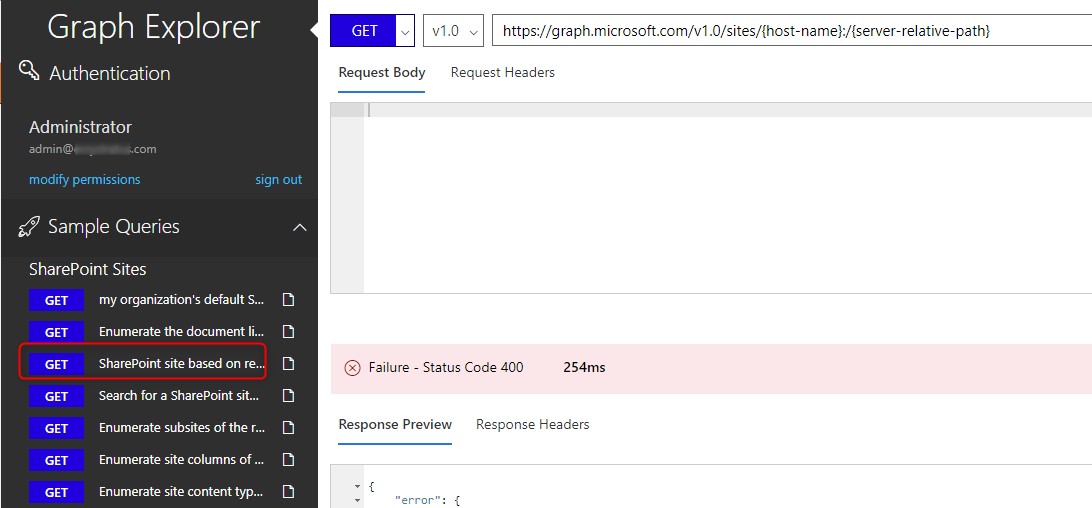
Use your host name and relative path and run query.

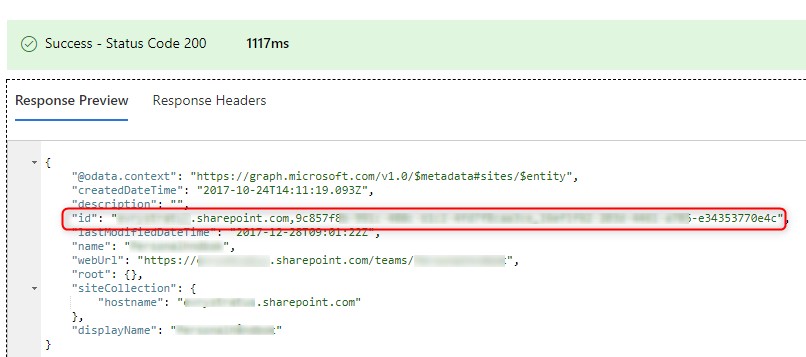
Save if of the site for future usage.
Go back to MS Flow and try to call Graph API using HTTP action (this way does not work, skip it):
Click an Add action and choose HTTP.
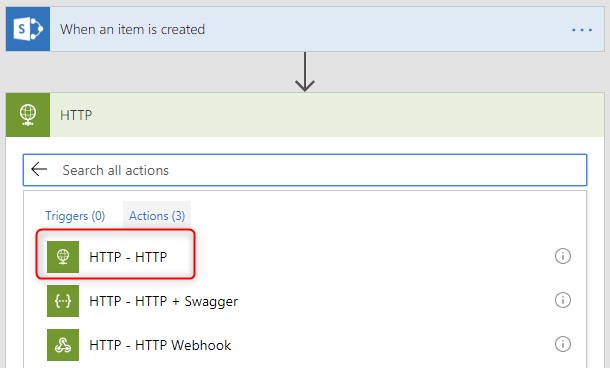
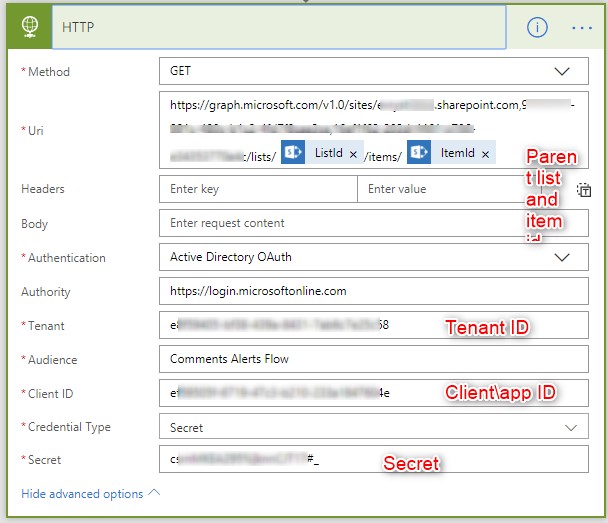
Save and try to run a flow (add any comment on the modern page of the site).
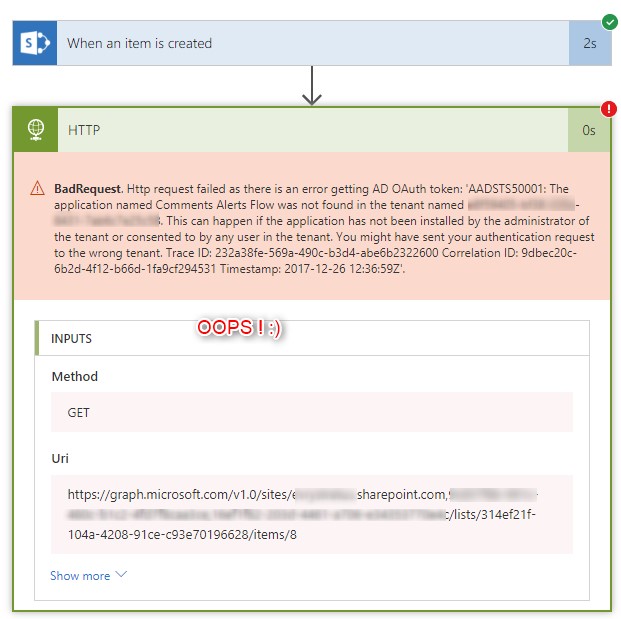
You see, a standard method of authorization doesn’t work.
Therefore, let’s try to retrieve access token in a separate http call:
Check an Authorization request in Postman:
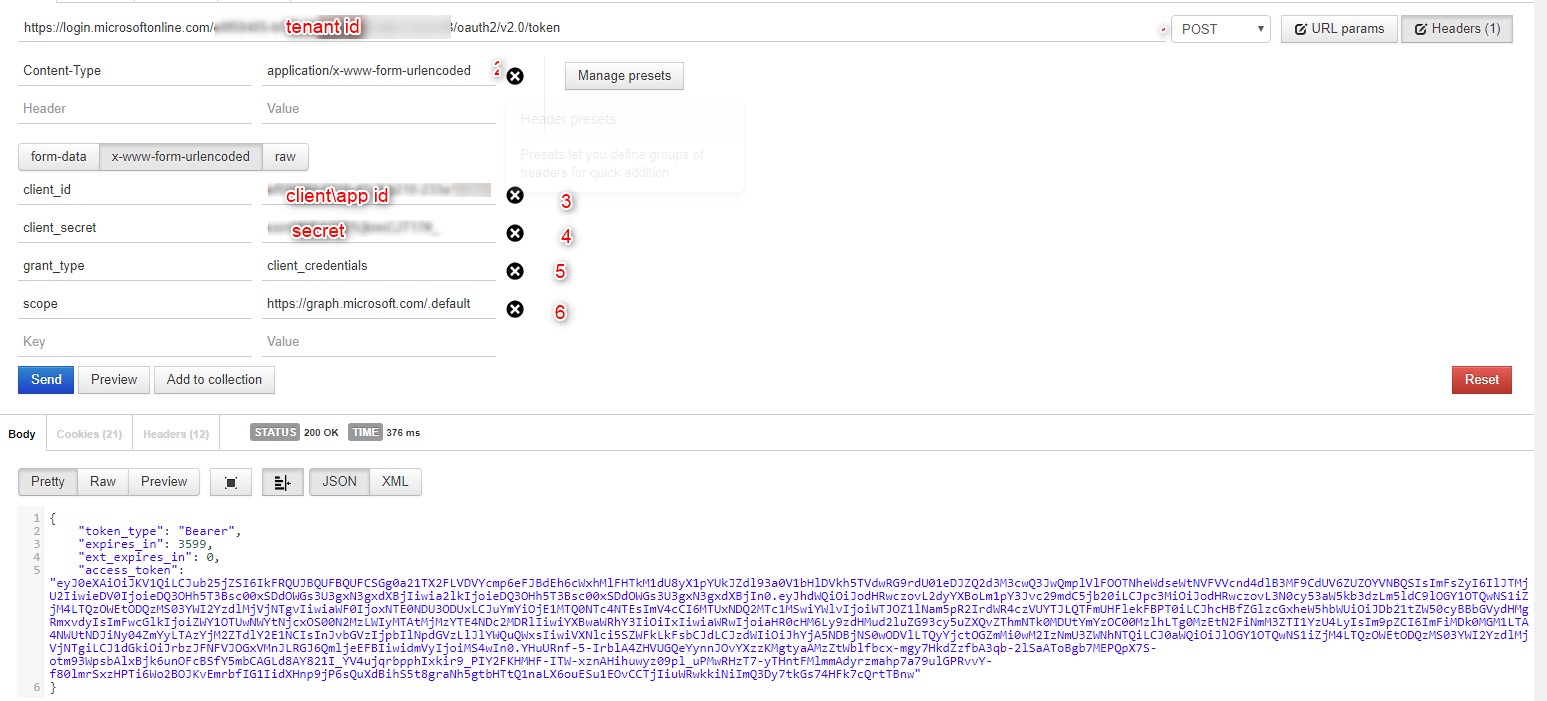
POSTHeaders:Content-Type: application/x-www-form-urlencodedBody:client_id={clientid}
&scope=https%3A%2F%2Fgraph.microsoft.com%2F.default
&client_secret={secret}
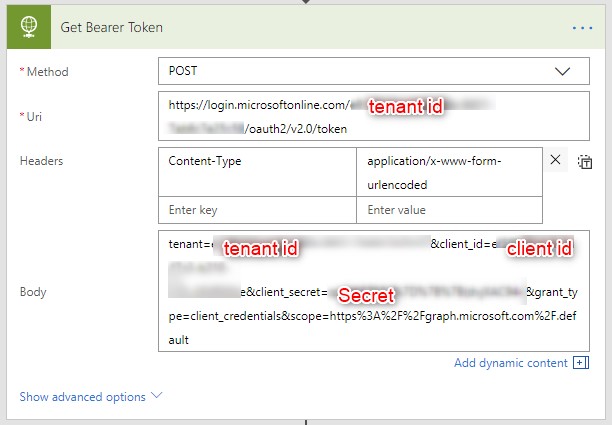
&grant_type=client_credentialsGo back to MS flow and add HTTP action. Don’t forget to rename the action! You will not be able to rename it if you use an output of the action in next actions.
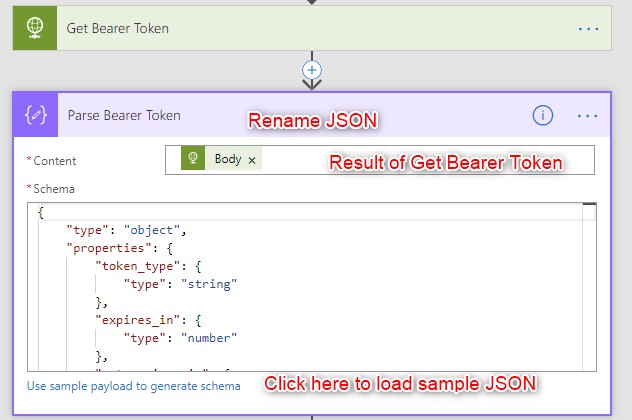
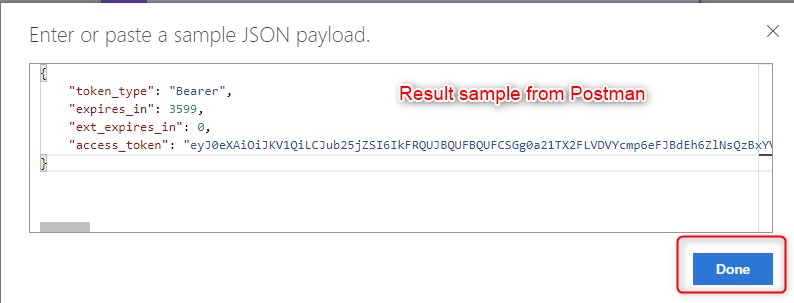
Add JSON action. Set content as Body from the previous action. Click “Use sample payload to generate schema” and paste JSON result from Postman (p.1).
Congratulations! You can proceed to the next step and use OAuth token in Graph API calls.
Step 6. Using Graph API inside MS Flow.
After the Parse Bearer Token action, add a new HTTP action: Call Graph API method “Get item in a list” with parameters ListId and ItemId. Add a header “Authorization=token_type access_token” (these parameters came as output of the “Parse Bearer Token” action).
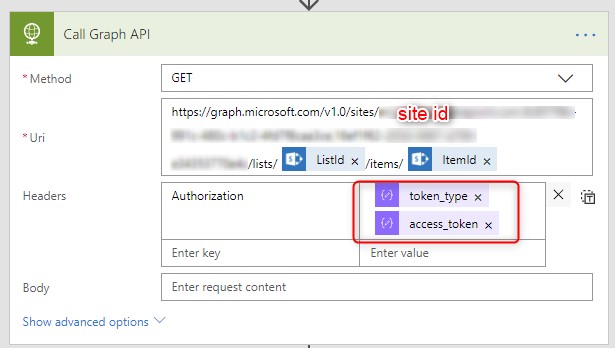
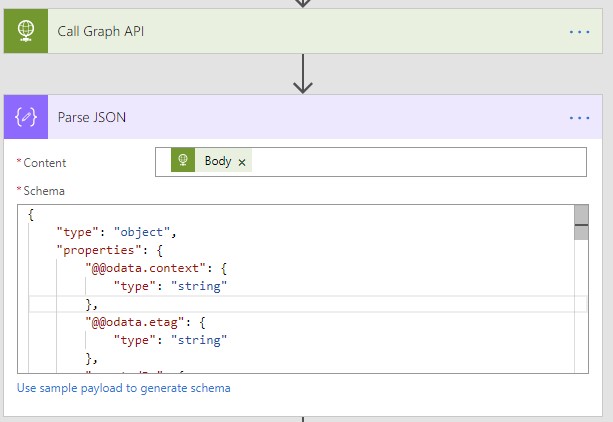
Add Parse JSON action and add schema using sample result from Postman. I removed redundant fields from Schema, because I had seven “id” fields in the output and only one is id of creator. So, in JSON schema I left only “id”, which belongs to “createdby”.
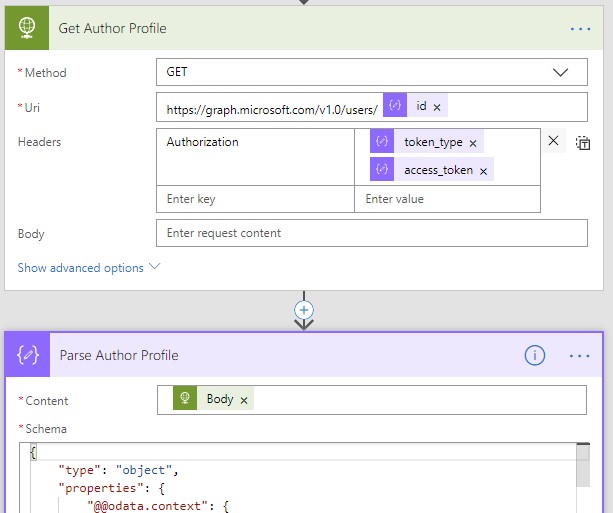
Call Graph API “Get a user” via HTTP action to receive the author email of the page and add Parse JSON action.
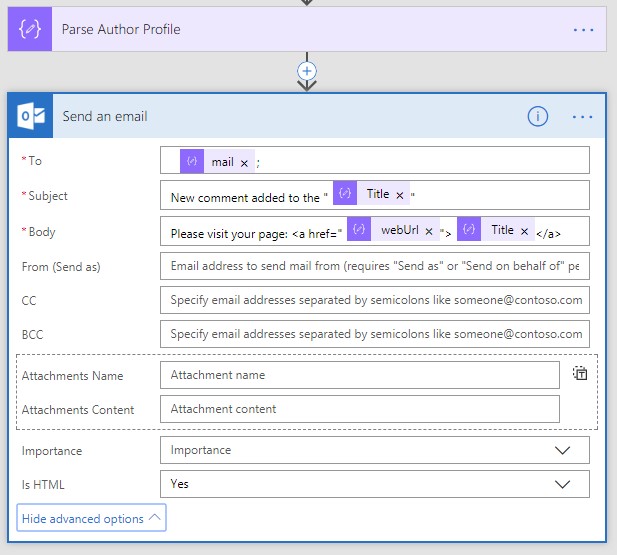
Add Send Email action:
Save the flow. It looks like this:
Step 7. Test the flow.
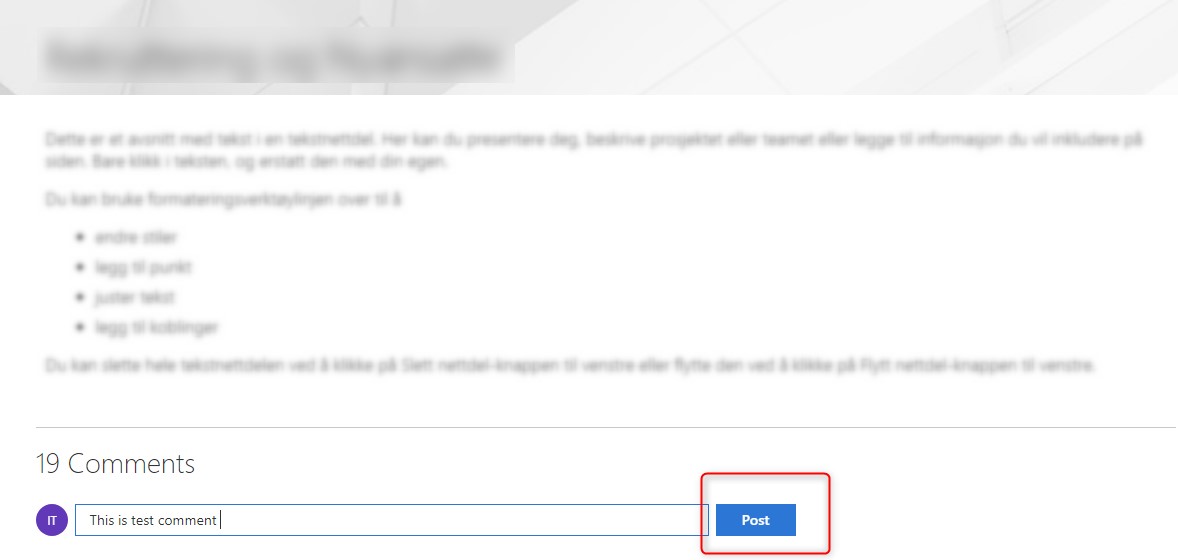
Open a target site and create a modern page or open the existing one.Post a comment.
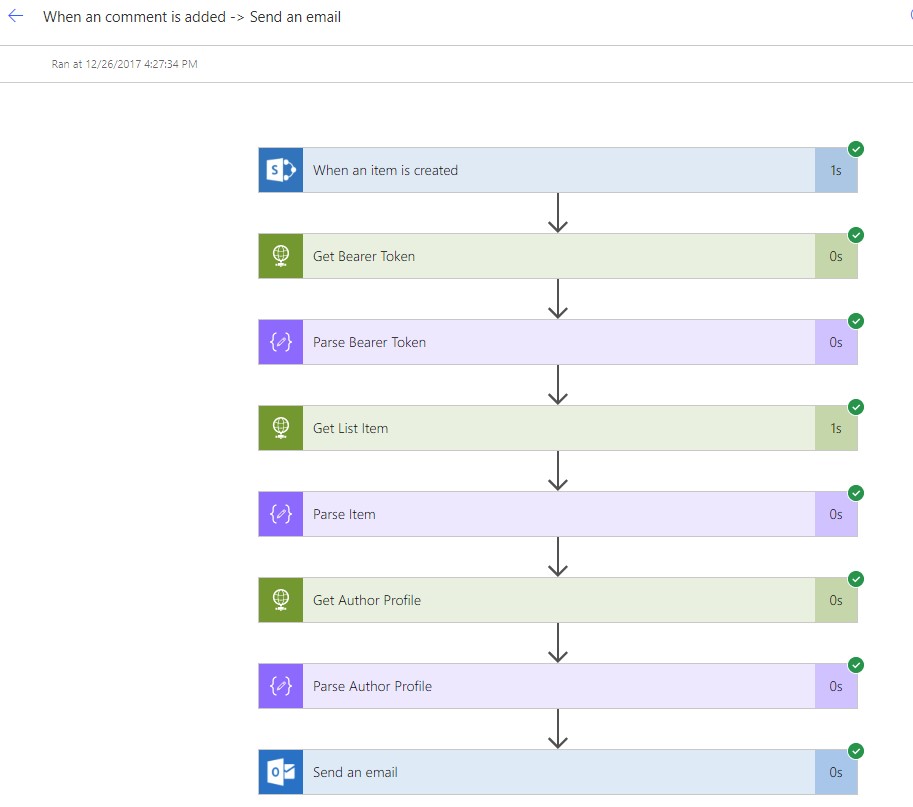
View the results.
Conclusion
In terms of software engineering, Microsoft Flow becomes a workflow tool which can replace SharePoint workflows. Comparing to what was 6 months ago, MS Flow now has more features which allow calling external API. In addition, Microsoft Graph API enables communication between different apps of Office 365.
I hope you enjoyed this quick tutorial and learned how to use Microsoft Graph API inside Microsoft Flow in Office 365.
What is Microsoft Graph API?

![Power Apps Licensing Guide [thumbnail]](/uploads/media/thumbnail-280x222-power-apps-licensing-guide.webp)
![How to Build Enterprise Software Systems [thumbnail]](/uploads/media/thumbnail-280x222-how-to-build-enterprise-software-systems.webp)
![Super Apps Review [thumbnail]](/uploads/media/thumbnail-280x222-introducing-Super-App-a-Better-Approach-to-All-in-One-Experience.webp)
![ServiceNow and Third-Party Integrations [thumbnail]](/uploads/media/thumbnail-280x222-how-to-integrate-service-now-and-third-party-systems.webp)
![Cloud Native vs. Cloud Agnostic [thumbnail]](/uploads/media/thumbnail-280x222-cloud-agnostic-vs-cloud-native-architecture-which-approach-to-choose.webp)
![DevOps Adoption Challenges [thumbnail]](/uploads/media/thumbnail-280x222-7-devops-challenges-for-efficient-adoption.webp)
![White-label Mobile Banking App [Thumbnail]](/uploads/media/thumbnail-280x222-white-label-mobile-banking-application.webp)

![Mortgages Module Flexcube [Thumbnail]](/uploads/media/thumbnail-280x222-Secrets-of-setting-up-a-mortgage-module-in-Oracle-FlexCube.webp)
![Challenges in Fine-Tuning Computer Vision Models [thumbnail]](/uploads/media/thumbnail-280x222-7-common-pitfalls-of-fine-tuning-computer-vision-models.jpg)