Extending Predefined ServiceNow CI modules – Part 1
Getting to Know ServiceNow Database Servers Menu
ServiceNow offers a number of Configuration Item (CI) modules out-of-the-box. These modules are used for grouping CIs of the same nature. By default, Database Servers module contains a set of 6 items – DB2, MSSQL, MySQL, Oracle, Sybase and All (to list everything on one page).
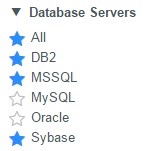
Fig. 1. Database Servers menu items
There are multiple ways to implement data retrieval from CMDB and represent it in the modules list.
In this particular case, all data regarding Database Servers is kept in a single table – cmdb_ci_database. Other five submodules merely represent a conditional selection of a type of the database server from the cmdb_ci_database table (fig. 2 shows Oracle server being selected).

Fig. 2. Example of CI sub-module filter
Thus, this approach is implemented in a way of keeping all data related to Database Servers in one table and provides a user with useful and convenient filters to select and display different types of Databases. To check how each particular module is implemented, right click on a module and select Edit Module item from the context menu.
As the above-mentioned actions are rather straightforward, let’s move on to a bit more complicated task.
Extending the List of Available Database Types
Our next step is to learn how to extend the list of available database types and how to make a new database module appear in the CI menu. Some changes and tweaks must be made to the different parts of the ServiceNow system in order to properly add a new database type.
Work Breakdown Structure may look rather simple at the first sight, but only if you know exactly what should be done. To get things done right, the next 4 steps should be done:
- Add support for a new type to the Database Server table;
- Create a new module in the CI menu;
- Configure the new module’s filter to select entries of a particular type among all database servers;
- Populate the new module with data and validate the results.
Let’s give these steps a closer look.
(1) Add support for a new type to the Database Server table.
Go to System Definition -> Tables & Columns -> Database (found in the Table Names list) -> Edit Table -> Descendants tab -> Type (a Display Name of the Dictionary Entry Class)
When in the Global Scope, select Choices tab and click New button.
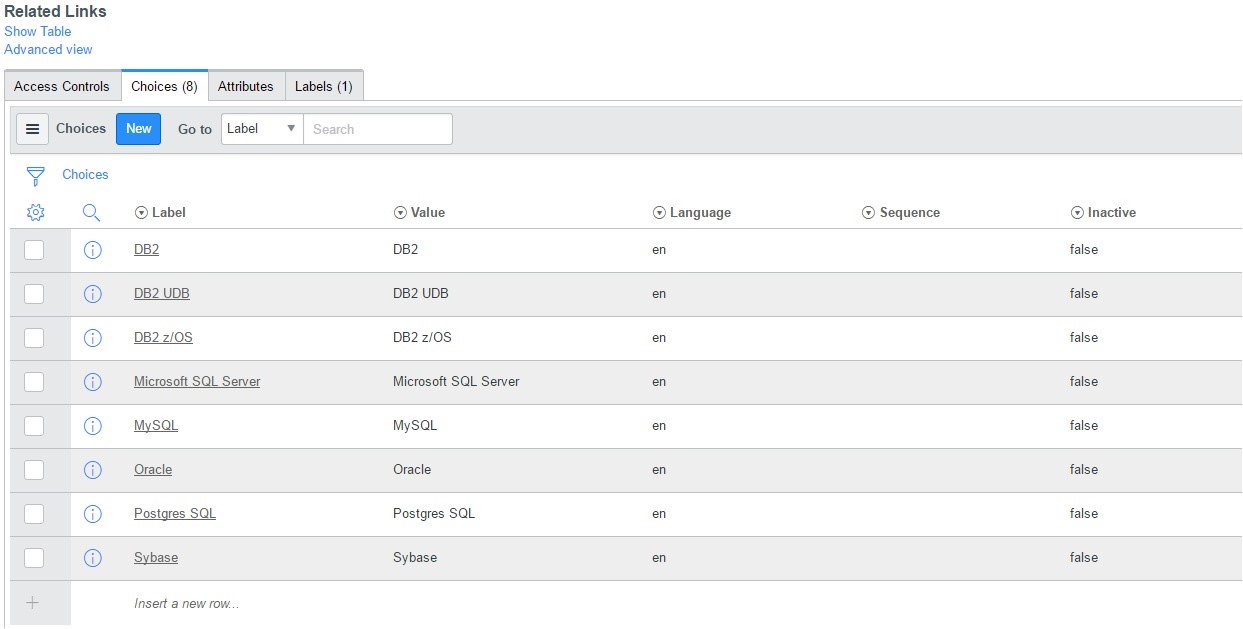
Fig. 3. List of Database Server types
Fill the mandatory fields with the relevant values and submit the result.
In this case, we’ve entered Informix to both mandatory fields.
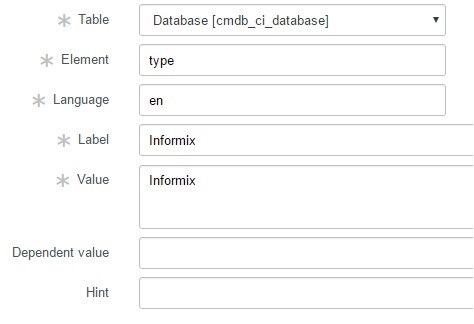
Fig. 4. New Database Servers type creation
(2) Create a new module in CI menu
Go to System Definition -> Modules -> create New one.
Enter Title field value that will be shown as the CI module name.
Configuration value is entered in the Application Menu as a part of a menu where the new module will be shown.
Order value defines the place in the Application Menu hierarchy, where the module will be shown.
(3) Configure the new module’s filter to select entries of a particular type among all database servers.
List of Records Link type means the nature of data to be shown.
Here filter can be defined as well. In this case, the module should establish a filter to select data from the cmdb_ci_database table with the recently created Informix type.
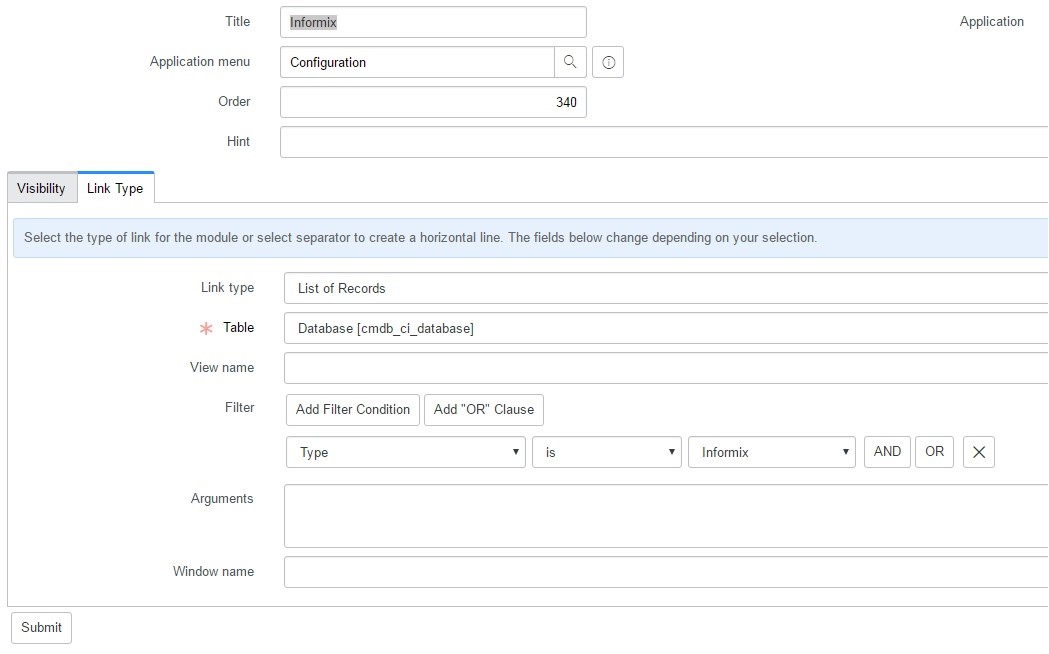
Fig. 5. New module creation
(4) Populate the new module with data and validate the results.
As a result of our previous actions, the new sub-module is now present in the Database Servers menu.
New data load and transformation map has to be implemented in order to populate the cmdb_ci_database table with the new entries of Informix RDBMS type.
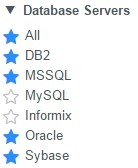
Fig. 6. Informix type is now present as a sub-module in the Database Servers menu
In the second part of our blog, we show a better way to create new ServiceNow CI modules and retrieve data from CMBD.


![Power Apps Licensing Guide [thumbnail]](/uploads/media/thumbnail-280x222-power-apps-licensing-guide.webp)
![Cloud-Native for Banking [thumbnail]](/uploads/media/cloud-native-solutions-for-banking_280x222.webp)
![Generative AI and Power BI [thumbnail]](/uploads/media/thumbnail-280x222-generative-AI-and-Power-BI-a-powerful.webp)
![AI for Risk Assessment in Insurance [thumbnail]](/uploads/media/aI-enabled-risk-assessment_280x222.webp)
![How to Build Enterprise Software Systems [thumbnail]](/uploads/media/thumbnail-280x222-how-to-build-enterprise-software-systems.webp)
![Super Apps Review [thumbnail]](/uploads/media/thumbnail-280x222-introducing-Super-App-a-Better-Approach-to-All-in-One-Experience.webp)
![ServiceNow and Third-Party Integrations [thumbnail]](/uploads/media/thumbnail-280x222-how-to-integrate-service-now-and-third-party-systems.webp)
![SAP Service Insight [thumbnail]](/uploads/media/Service Insight-Infopulse-SAP-Vendor-280x222.webp)
![Carbon Management Challenges and Solutions [thumbnail]](/uploads/media/thumbnail-280x222-carbon-management-3-challenges-and-solutions-to-prepare-for-a-sustainable-future.webp)
![White-label Mobile Banking App [Thumbnail]](/uploads/media/thumbnail-280x222-white-label-mobile-banking-application.webp)